Event Check-in Best Practices: From Planning to Post-Event Reporting
Planning Your Check-in Flow
Check-in is the first experience attendees have at your event. A smooth, fast process creates a positive first impression. A slow, confusing one frustrates people before the first session even starts. The good news: most check-in problems are preventable with planning.
Map the Physical Flow
Before choosing technology or counting devices, walk through the venue and map the attendee journey from entrance to event space:
- Where do attendees enter the building? Is there one entrance or multiple? If there are multiple entrances, you may need check-in stations at each one.
- How far is the registration area from the entrance? If it is around a corner or up an escalator, you need signage to direct people.
- Where is the queue space? Lines will form during peak arrival. Identify where the queue can extend without blocking hallways, fire exits, or other event areas.
- Where is the power? Check-in stations need electricity for tablets and printers. Note the location of power outlets and plan extension cords accordingly.
- What is the Wi-Fi situation? Test the venue Wi-Fi in the registration area. If it is weak, plan for offline-capable check-in software or request a dedicated access point from the venue.
Define Check-in Requirements
Before event day, decide:
- Will attendees receive a badge? If yes, what information is on it?
- Are there different check-in processes for different attendee types (VIPs, speakers, general)?
- Is walk-in registration allowed?
- Do attendees need to collect materials (programs, swag bags) at check-in or at a separate table?
- Is there a credential verification step (ID check, invitation code)?
Each added step increases check-in time per person. Keep the process as simple as possible and move non-essential steps (swag collection, session selection) to separate stations after check-in.
Staffed, Self-Service, or Hybrid?
Staffed Check-in Desks
A staff member sits behind a table with a tablet or laptop, scans each attendee's QR code (or searches by name), and hands over a badge or lanyard. This is the traditional model.
When to use it: Events where personal interaction matters (high-end galas, executive summits), events with complex check-in processes (credential verification, payment collection), and events where most attendees are unfamiliar with self-service technology.
Throughput: 60-90 attendees per hour per staffed station, depending on process complexity.
Self-Service Kiosks
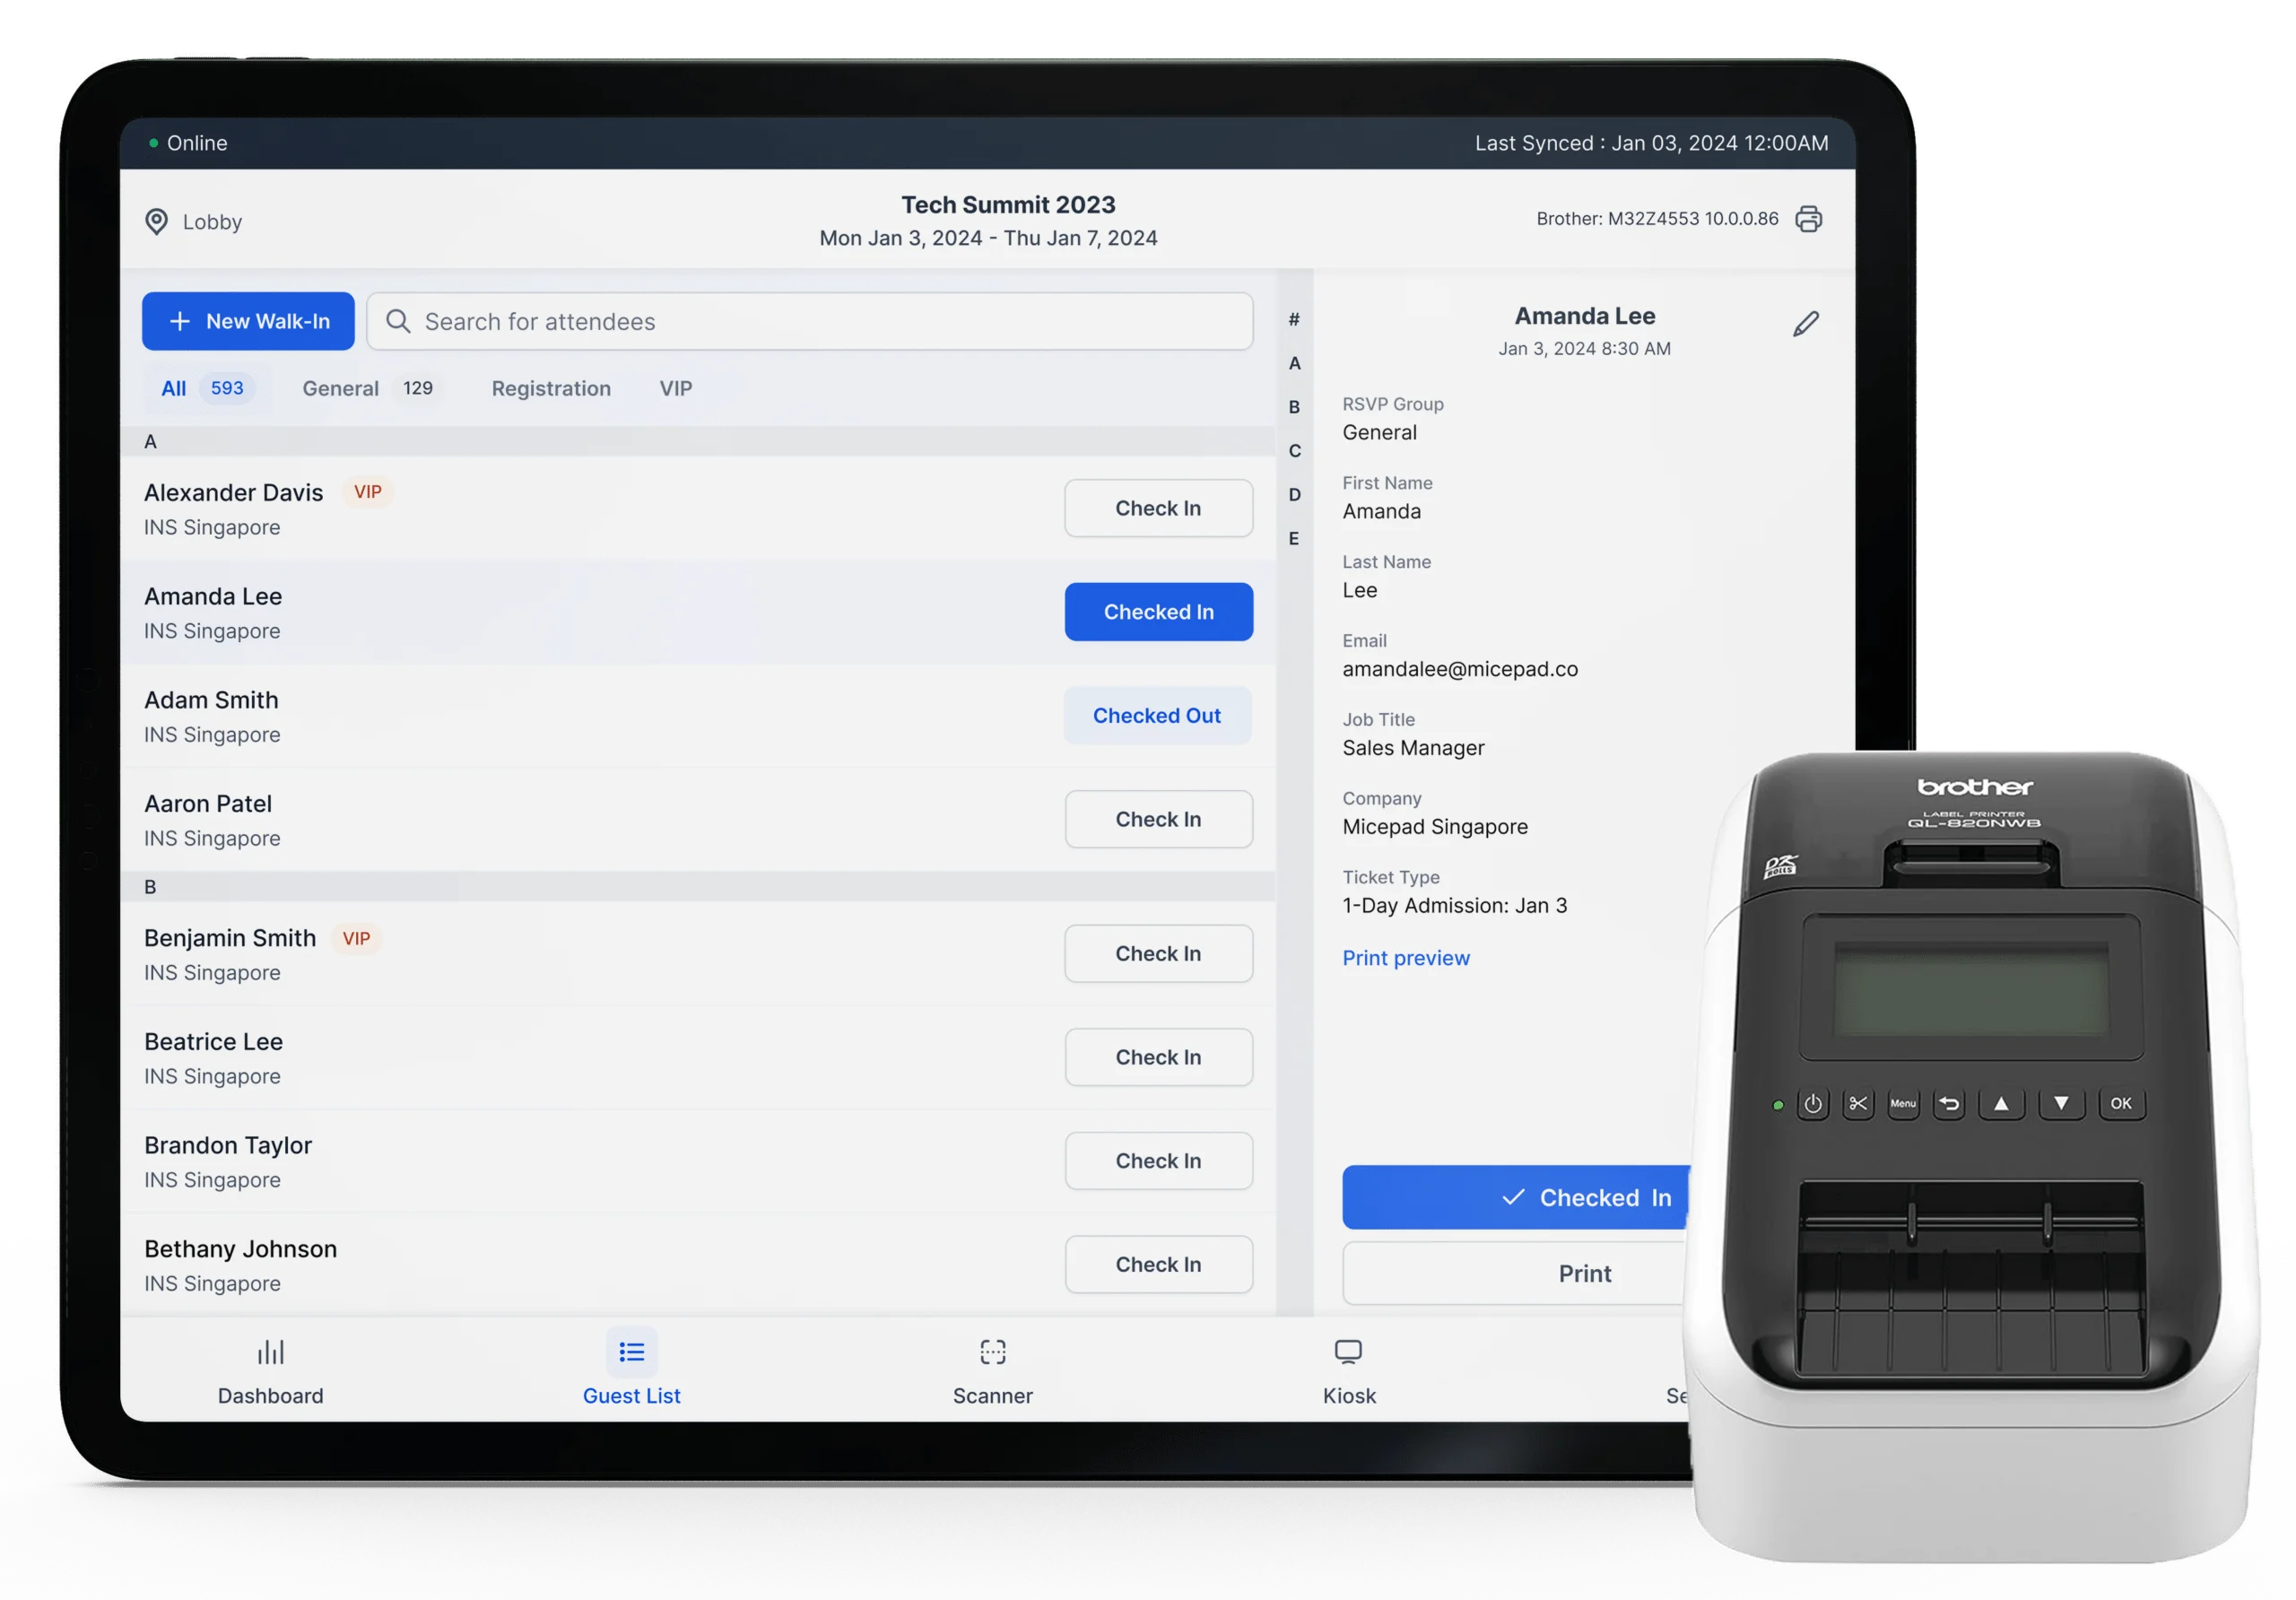
An iPad or tablet on a stand, running a check-in app in kiosk mode. Attendees walk up, scan their QR code (or search their name), and a badge prints automatically at a nearby printer. No staff interaction required.
When to use it: Tech-savvy audiences (tech conferences, startup events), events over 200 attendees where speed is a priority, and events where you want to minimize registration desk staff costs.
Throughput: 80-120 attendees per hour per kiosk. Faster than staffed desks because there is no conversation overhead.
Hybrid Approach (Recommended for Most Events)
Combine self-service kiosks for the majority of attendees with 1-2 staffed desks for exceptions: walk-ins, name changes, VIP handling, and anyone who needs help. This gives you the speed of kiosks with the flexibility of human staff.
A practical split for a 500-person event: 4 self-service kiosks + 2 staffed desks. The kiosks handle 70-80% of check-ins. The staffed desks handle the remaining 20-30% plus any problems.
How Many Check-in Stations Do You Need?
The number of check-in stations depends on three variables:
- Total attendees expected (not registered -- account for your typical no-show rate)
- Throughput per station (scans per hour)
- Arrival window (the time period when most people arrive)
The Formula
Stations needed = Expected attendees in peak window / (Throughput per station per hour x Peak window hours)
Example: 600-person conference. 80% show rate = 480 actual attendees. 70% arrive between 8:00-9:00 AM = 336 people in a 1-hour window. Self-service kiosks process ~100 people per hour each.
Stations needed = 336 / (100 x 1) = 3.36 --> round up to 4 kiosks
Add 1-2 staffed desks for exceptions = 6 total stations.
Quick Reference Table
- 50-100 attendees: 1-2 stations (1 kiosk + 1 staffed desk)
- 100-300 attendees: 2-4 stations (2 kiosks + 1-2 staffed desks)
- 300-500 attendees: 4-6 stations (3-4 kiosks + 1-2 staffed desks)
- 500-1,000 attendees: 6-10 stations (5-8 kiosks + 1-2 staffed desks)
- 1,000-5,000 attendees: 10-20 stations across multiple check-in areas
- 5,000+ attendees: 20+ stations, multiple registration zones, dedicated VIP lanes
Always round up. An extra kiosk costs far less than a long queue of frustrated attendees.
Equipment Checklist
Prepare this equipment list at least one week before the event. Do not leave procurement to the last day.
Check-in Devices
- iPads or tablets (one per kiosk + one per staffed desk + 1-2 spares)
- iPad stands or kiosk enclosures for self-service stations
- Protective cases for all devices
- Screen protectors (fingerprints reduce readability)
Badge Printing
- Thermal printers (one per 2-3 kiosks is usually sufficient). Recommended models: Zebra ZD421, Zebra ZD621, Brother QL-820NWB, Brother QL-1110NWB
- Badge label stock (order 20% more than your expected attendance to cover reprints, test prints, and walk-ins)
- Lanyards or badge holders
- Extra label rolls (at least one spare per printer)
Power and Connectivity
- Power strips (one per 2-3 check-in stations)
- Extension cords (at least 3 meters / 10 feet each)
- Charging cables for all tablets (Lightning or USB-C depending on device)
- Portable Wi-Fi hotspot as backup (if your check-in software supports it)
- Gaffer tape to secure cables to the floor (prevents tripping hazards)
Signage and Supplies
- "Check-in" directional signs (from building entrance to registration area)
- Station signs: "Self-Service Check-in," "Help Desk," "Walk-in Registration"
- Alphabetical signs if using staffed desks sorted by last name (A-F, G-L, etc.)
- Pens (for manual forms as absolute last resort)
- Printed attendee list (backup for complete technology failure)
Day-of Setup: Arrive Early, Test Everything
Setup Timeline
For a 9:00 AM event start, plan for this timeline:
- 6:30 AM -- Registration team arrives. Unload equipment. Arrange tables and power.
- 7:00 AM -- Power on all devices. Connect to Wi-Fi. Launch check-in app on each device. Sync attendee data.
- 7:15 AM -- Connect and test all printers. Print 3-5 test badges per printer. Verify print quality and alignment.
- 7:30 AM -- Run full test: scan a test QR code at each station, verify check-in registers, confirm badge prints at the correct printer. Test offline mode by disconnecting Wi-Fi briefly.
- 7:45 AM -- Brief all registration staff. Walk through the process, troubleshooting steps, and escalation contacts.
- 8:00 AM -- Place signage. Set up queue barriers or directional markers.
- 8:15 AM -- Final walk-through. Confirm everything works. Open doors at 8:30 AM or when the first attendees arrive.
The 15-Minute Test
Before opening doors, every check-in station must pass this test:
- Scan a QR code -- does the attendee record appear?
- Complete the check-in -- does the dashboard count update?
- Print a badge -- does it come out of the correct printer with correct data?
- Search by name -- can you find an attendee without a QR code?
- Disconnect Wi-Fi -- does check-in still work offline?
If any station fails, troubleshoot immediately. This is why you arrive 2.5 hours before the event, not 30 minutes.
Handling Common Problems
Walk-ins (Unregistered Attendees)
Every event gets walk-ins. Have a clear process:
- Direct walk-ins to a designated staffed desk (not the self-service kiosks).
- Use your check-in software's walk-in registration feature to add them to the system on the spot. Tools like Micepad support walk-in registration with immediate badge printing.
- Collect the minimum required information: name, email, company. Do not hold up the line with a 10-field form.
- Print their badge and hand them a lanyard. They should have the same experience as pre-registered attendees from this point forward.
No-Shows
If you pre-printed badges, no-shows mean wasted materials and time. This is one of the strongest arguments for on-demand badge printing -- badges only print when someone actually checks in, so your 20-30% no-show rate costs you nothing in wasted labels.
For post-event follow-up, export the list of registered-but-not-checked-in attendees. Send a brief follow-up email with session recordings or highlights.
Name Changes and Corrections
An attendee says: "My name is spelled wrong" or "I changed companies since I registered." At a staffed desk, the staff member edits the record in the check-in app and reprints the badge. This takes 30-60 seconds. At a kiosk, route these attendees to a staffed help desk.
VIP and Speaker Handling
VIPs and speakers should not wait in the general check-in line. Options:
- Pre-printed badges -- print VIP badges in advance and have them sorted in envelopes at a dedicated pickup point.
- Dedicated lane -- a separate check-in station reserved for speakers, sponsors, and VIP guests. Use signage and a rope barrier to keep the general queue separate.
- Concierge check-in -- a staff member with a tablet meets VIPs at the door and walks them through check-in personally.
Technology Failures
Wi-Fi goes down: If your check-in software supports offline mode, check-in continues uninterrupted. Data syncs when connectivity returns. This is a must-have feature for any event over 100 attendees.
Tablet freezes: Force-restart the device (hold power + home button on iPad). The check-in app should restore to its previous state. This is why you have spare tablets.
Printer stops printing: Check: Is it powered on? Is there label stock? Is the Bluetooth/Wi-Fi connection active? If a printer is down, redistribute its queue to another printer. Have spare label rolls accessible, not buried in a supply box.
Complete system failure: Use the printed attendee list (you did print one, right?) and manual check-off. This is slow but it works. Assign one person to manually track check-ins and enter them into the system once it recovers.
Staff Training and Roles
Registration desk staff need a clear understanding of their roles. Assign these specific positions:
- Kiosk monitors (1 per 3-4 kiosks): Roam between self-service kiosks. Help attendees who are struggling. Clear paper jams. Restart frozen devices. Direct walk-ins to the staffed desk.
- Staffed desk operators (1 per desk): Handle name searches, walk-in registration, badge reprints, and attendee questions. These need to be your most experienced staff.
- Queue manager (1 for events over 300): Stands at the entrance to the registration area. Directs pre-registered attendees to kiosks and walk-ins to the staffed desk. Keeps the queue moving and prevents bottlenecks.
- Runner (1 for events over 500): Handles logistics: fetching spare label rolls, replacing dead tablets with charged spares, carrying badges from printer to pickup point if they are separated.
- Tech lead (1): The person who set up the system and knows how to troubleshoot every component. Available for escalation. Not assigned to a station so they are free to float.
Hold a 15-minute briefing before doors open. Cover: the check-in process, how to handle walk-ins, who to call for tech problems, and where supplies are stored.
Post-Event: Attendance Reports and Follow-up
Immediate Post-Event (Same Day)
Before you tear down the registration area:
- Ensure all devices have synced their data (especially if any were in offline mode).
- Export the final attendance report from your check-in software.
- Note any discrepancies: walk-ins that were added on paper but not in the system, badge reprints, unusual incidents.
Within 48 Hours
- Send the attendance report to stakeholders. Include: total registered, total checked in, show rate, peak arrival time, and walk-in count.
- Share lead data with sponsors (if applicable and consented). Most check-in platforms export sponsor-specific data separately.
- Follow up with no-shows. Send them session recordings, highlights, or a discount code for the next event.
Within One Week
- Debrief with your registration team. What worked? What was slow? What surprised you? Document these learnings for the next event.
- Review session-level attendance data (if tracked). Share with the content team for next year's programming decisions.
- Calculate cost-per-attendee. Total event cost divided by actual (not registered) attendees. This is the number your finance team and sponsors care about.
Checklist Summary
Use this as a quick reference when planning your next event check-in:
2+ Weeks Before:
- Choose check-in software and create your event
- Calculate station count using the formula above
- Order or arrange equipment (tablets, printers, label stock, lanyards)
- Design badge template
- Import attendee list and send QR code confirmation emails
1 Week Before:
- Visit venue and map the check-in area
- Confirm power outlet locations and plan extension cords
- Test Wi-Fi in the registration area
- Print backup attendee list
- Prepare directional signage
Day Before:
- Charge all tablets and spare batteries
- Load label stock in all printers and test-print
- Confirm final attendee count and sync data
- Brief registration staff on process and troubleshooting
Day Of:
- Arrive 2-2.5 hours before doors open
- Run the 15-minute test on every station
- Place signage
- Open doors with confidence
A well-executed check-in sets the tone for the entire event. Plan thoroughly, test relentlessly, and have a backup for everything. The attendees will never notice how much work went into making it feel effortless -- and that is exactly the point.
Micepad Team
Micepad - Enterprise Event Management Software